
There are no products in your shopping cart yet.
Review of the Kase IR720 filter
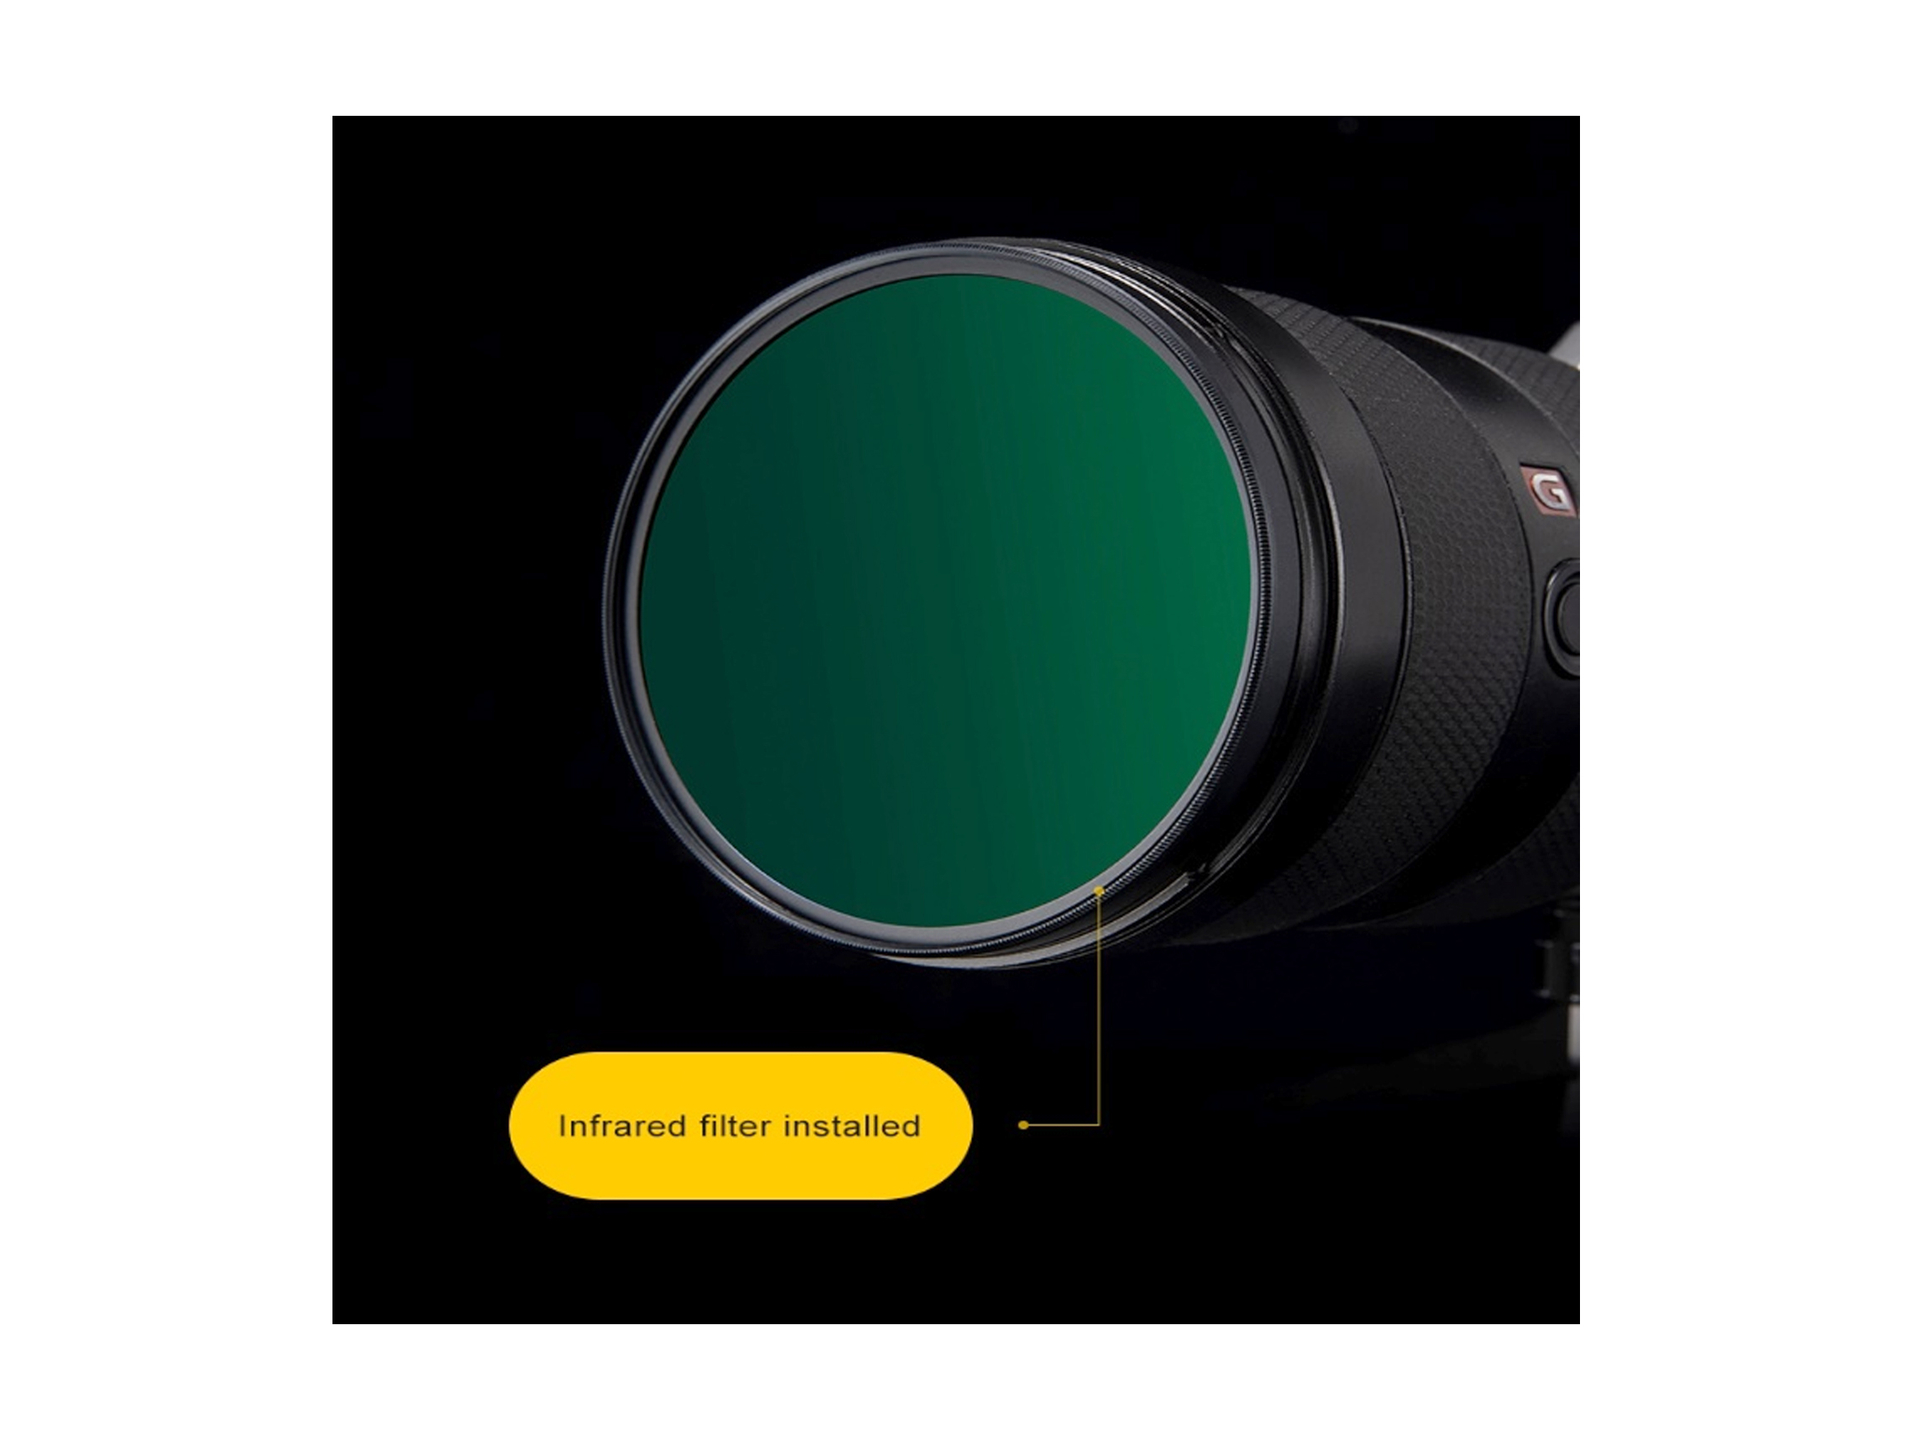
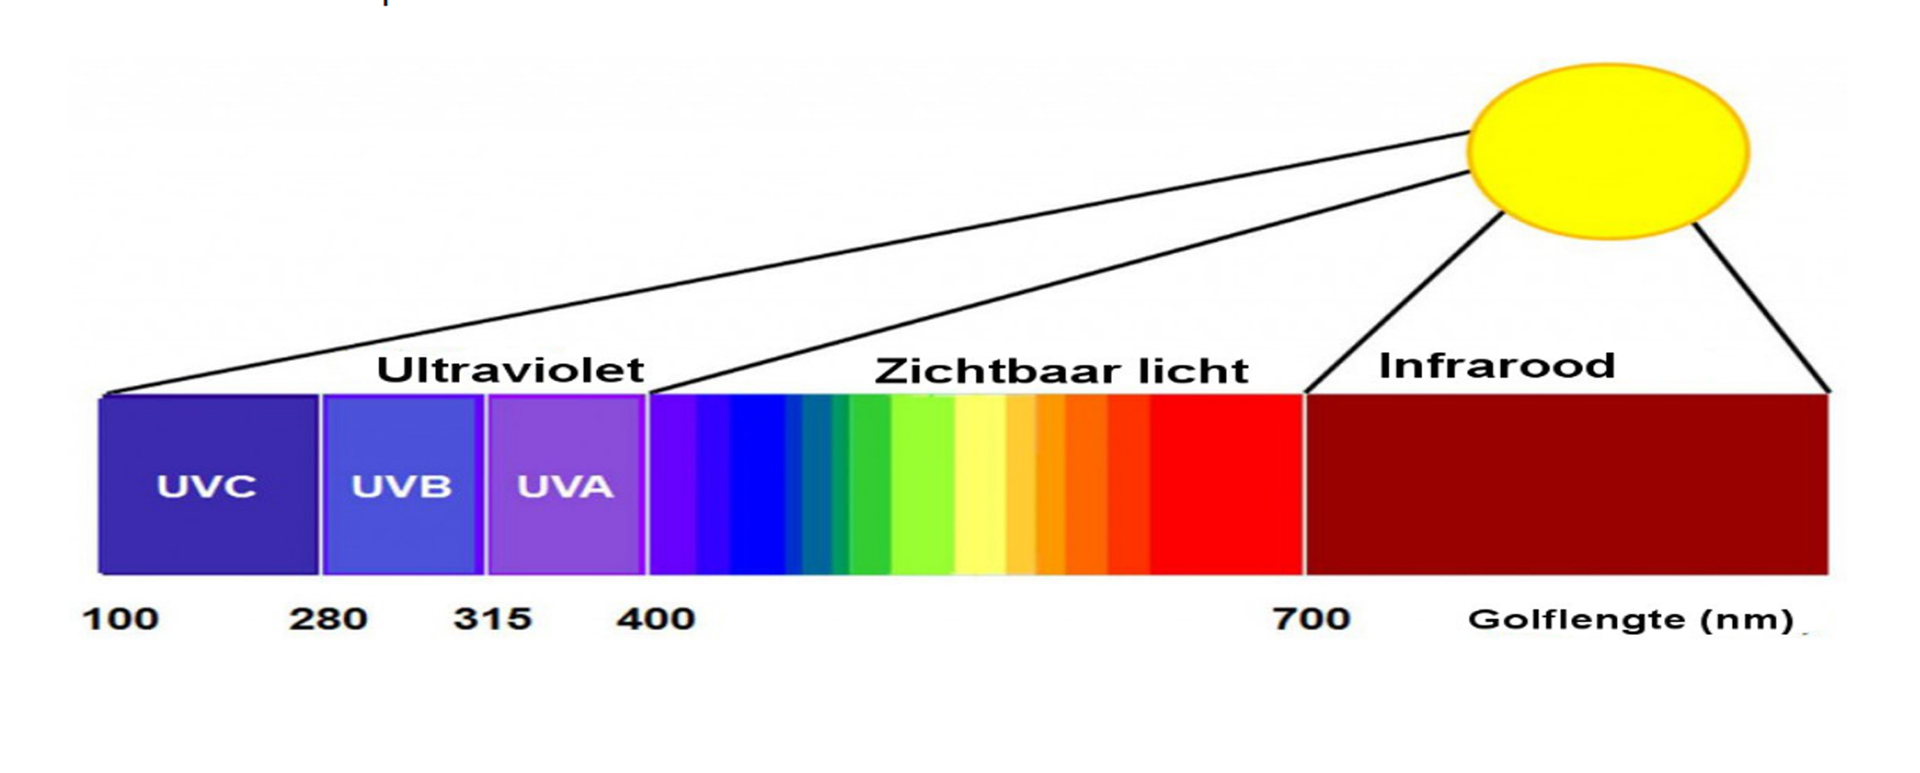
As a Brand Ambassador for Kase Filters Benelux, I occasionally get the opportunity to try out a new filter and report my findings. This time I was sent the Kase Filter IR720. The IR720 is an infrared filter of 720 nanometers. Infrared filters start from 590nm to 910nm, which is perfectly in the middle of the infrared spectrum.
The Kase filter IR720 is a filter that does not require any adjustments to your camera (remove the infrared filter in the camera), so it can be used on almost any DSLR and/or system camera. Before purchasing the filter, it is important to check that your camera can work perfectly with the IR720 filter. This is how you do it;
- Take the TV remote and point it at your lens attached to the camera.
- Press any button on your remote control.
- If there is a (bright) red light on your remote control, your camera is suitable.
- If there is no red light but minimal, it is possible, but you will not get good results with the IR720.
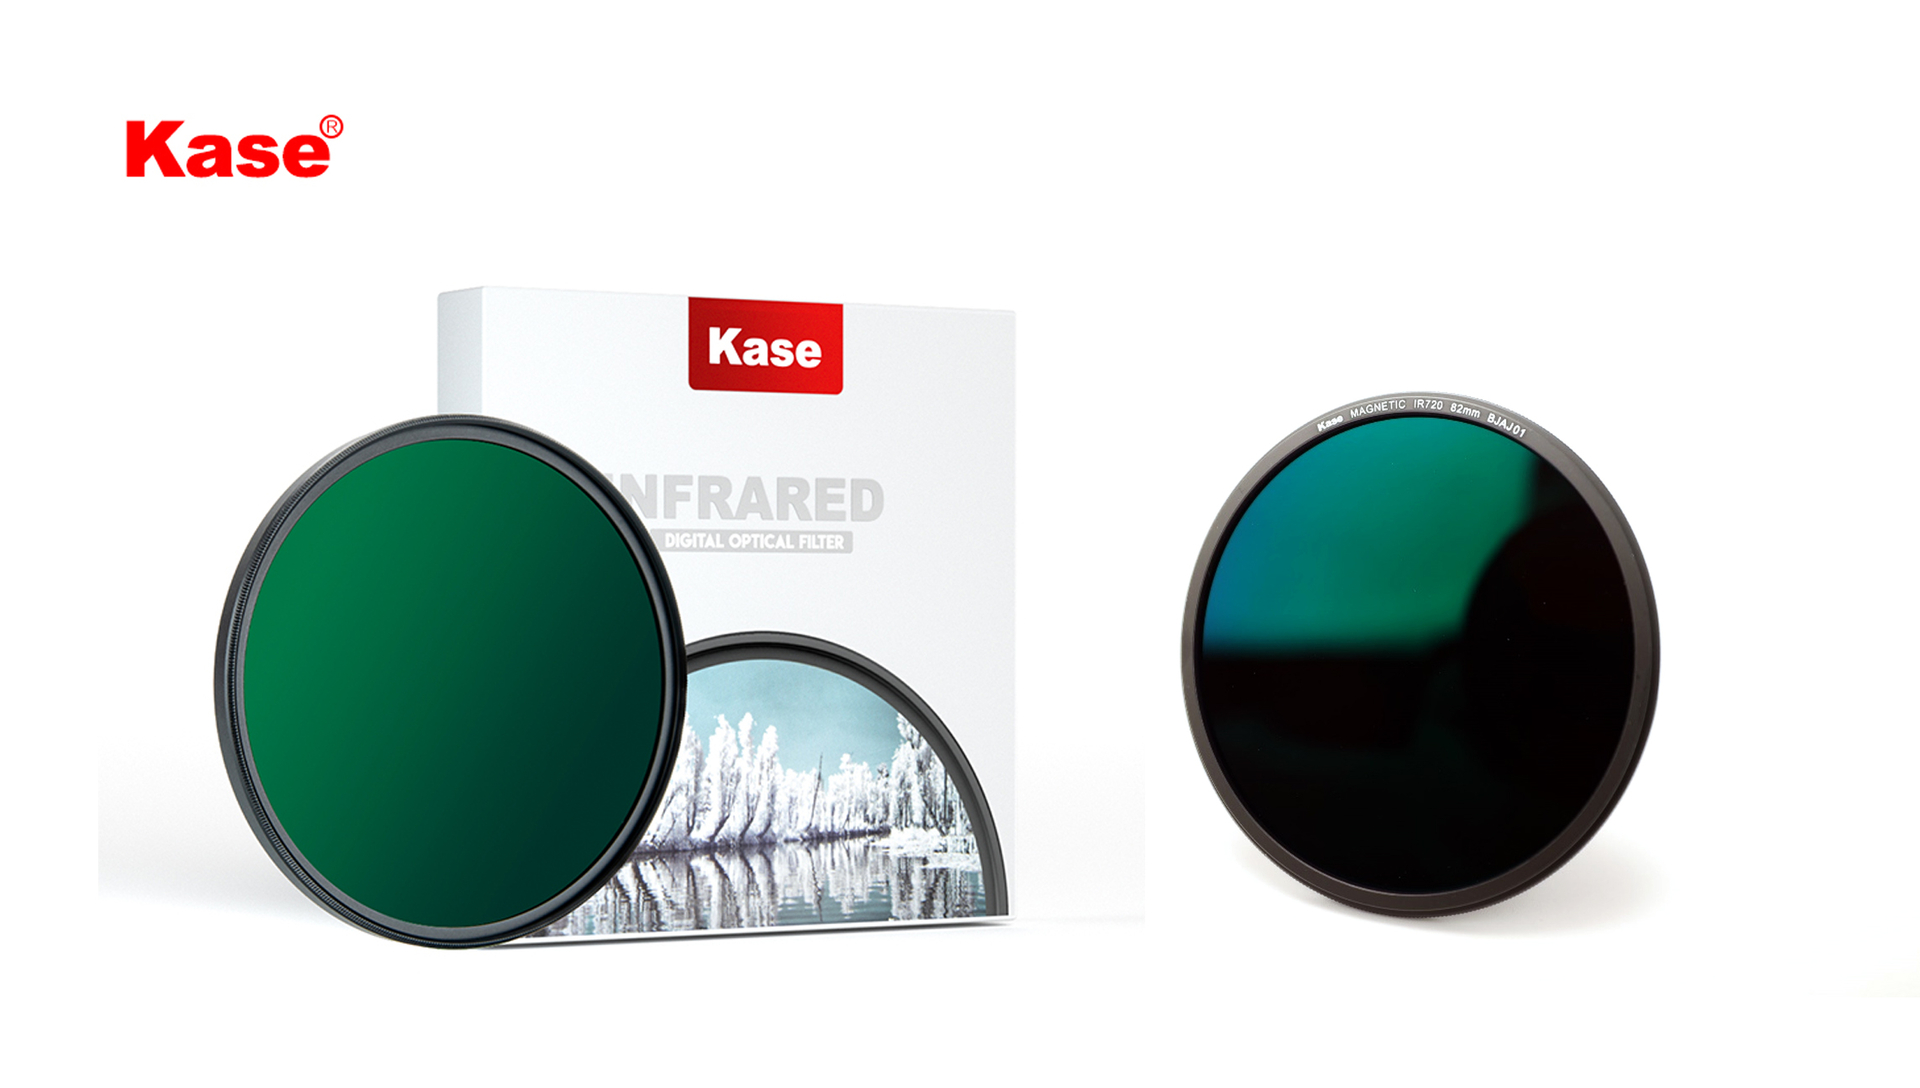
The Kase IR720 filter is currently available in 77mm and 82mm both as a screw bottle or as a magnetic filter.
- The magnetic Kase IR720 filter comes with a magnetic adapter ring
The Kase filter is supplied in a sturdy storage box and can easily absorb shocks. The storage box will also not open by itself and is equipped with a good closure. The filter itself, when opening the storage box, can be easily removed and installed. Important features of the IR720 Kase - filter;
- Tempered Pro HD optical glass
- Scratch resistant
- Metallic Nano Coatings
- Water and dust/dirt repellent
- Easy to clean
The Kase Wolverine Series Filters are ranked by independent reviews as some of the best optically and their tempered glass construction adds extra durability and peace of mind. Kase Wolverine filters are not indestructible, but are rated as tougher than standard glass filters, hopefully able to withstand the occasional accidental drop so you can continue to take great photos.
With no discernible color cast you can capture the true scene colors and the optical quality of the glass gives you great sharpness. The special metal nano electro-coated glass makes Kase Wolverine filters scratch-resistant, water-repellent, anti-reflective and easy to clean. Making the Kase Wolverine series a joy to use in the field, no matter what conditions you're shooting in.
The standard IR720 Kase filter:
By default it is certainly not inadequate. Standard is the norm, the path to the true IR filter, allowing the user to capture all the infrared light with a small portion of the visible light. This filter is great for monochromatic photos or muted color infrared photos.
How to take a good and beautiful infrared photo:
- Switch your camera to Manual and shoot in RAW.
- You will have to check everything yourself. In some situations you may also need to focus manually.
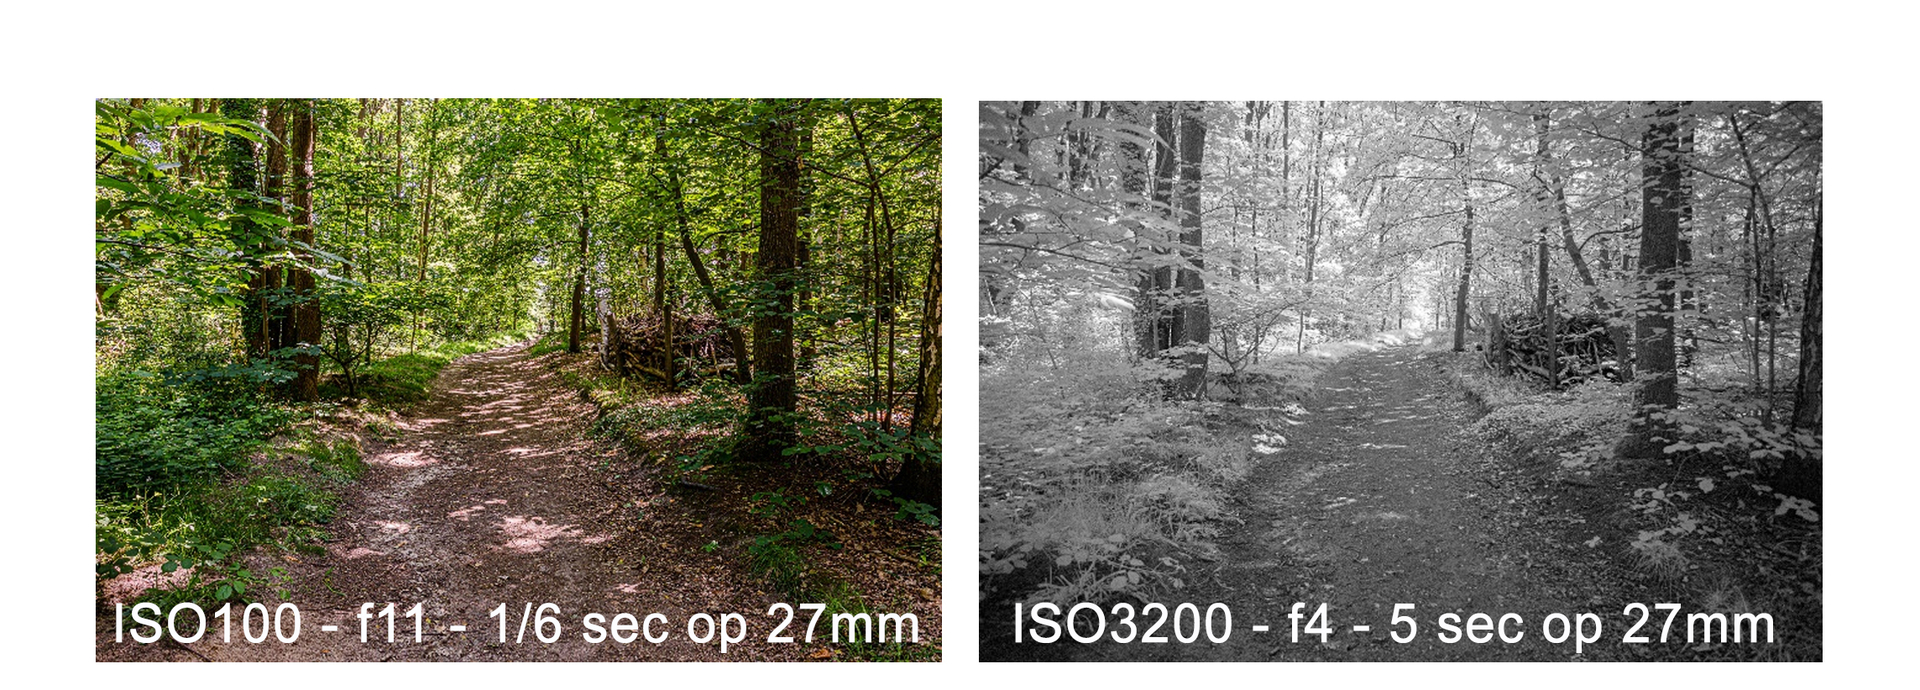
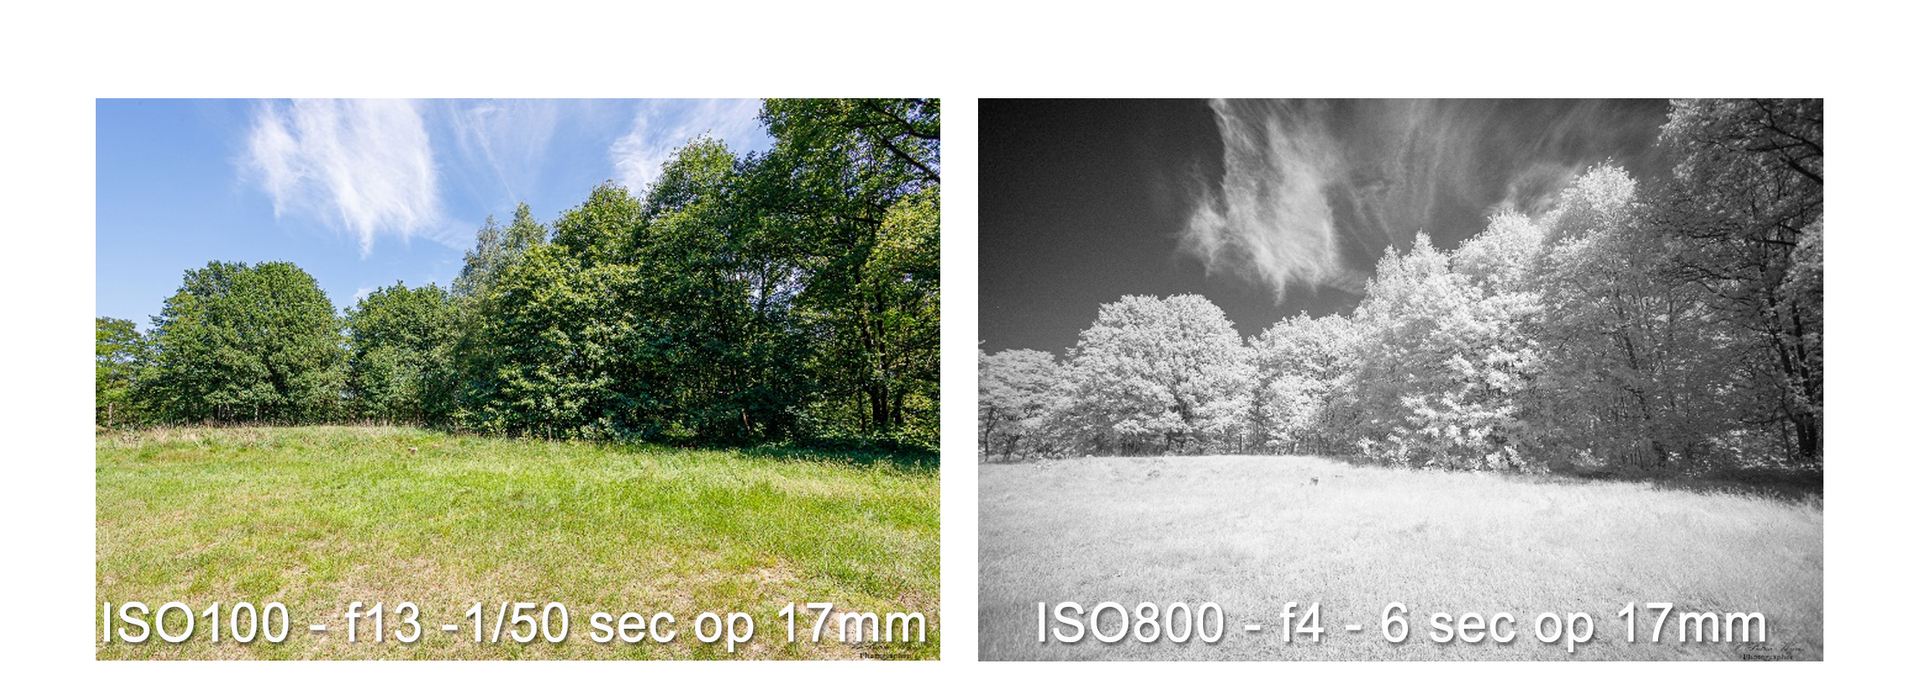
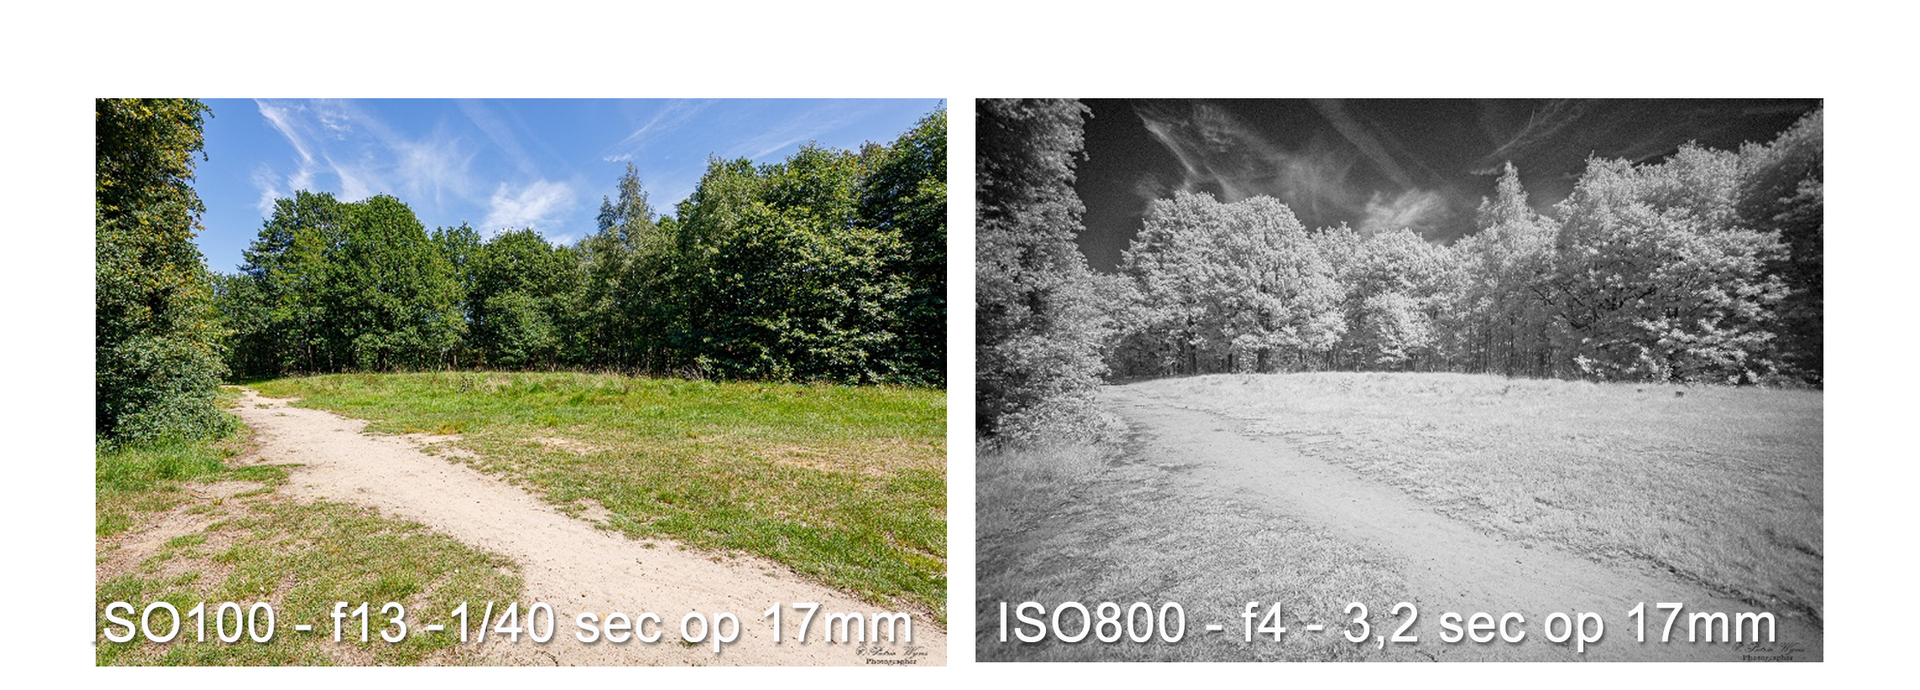
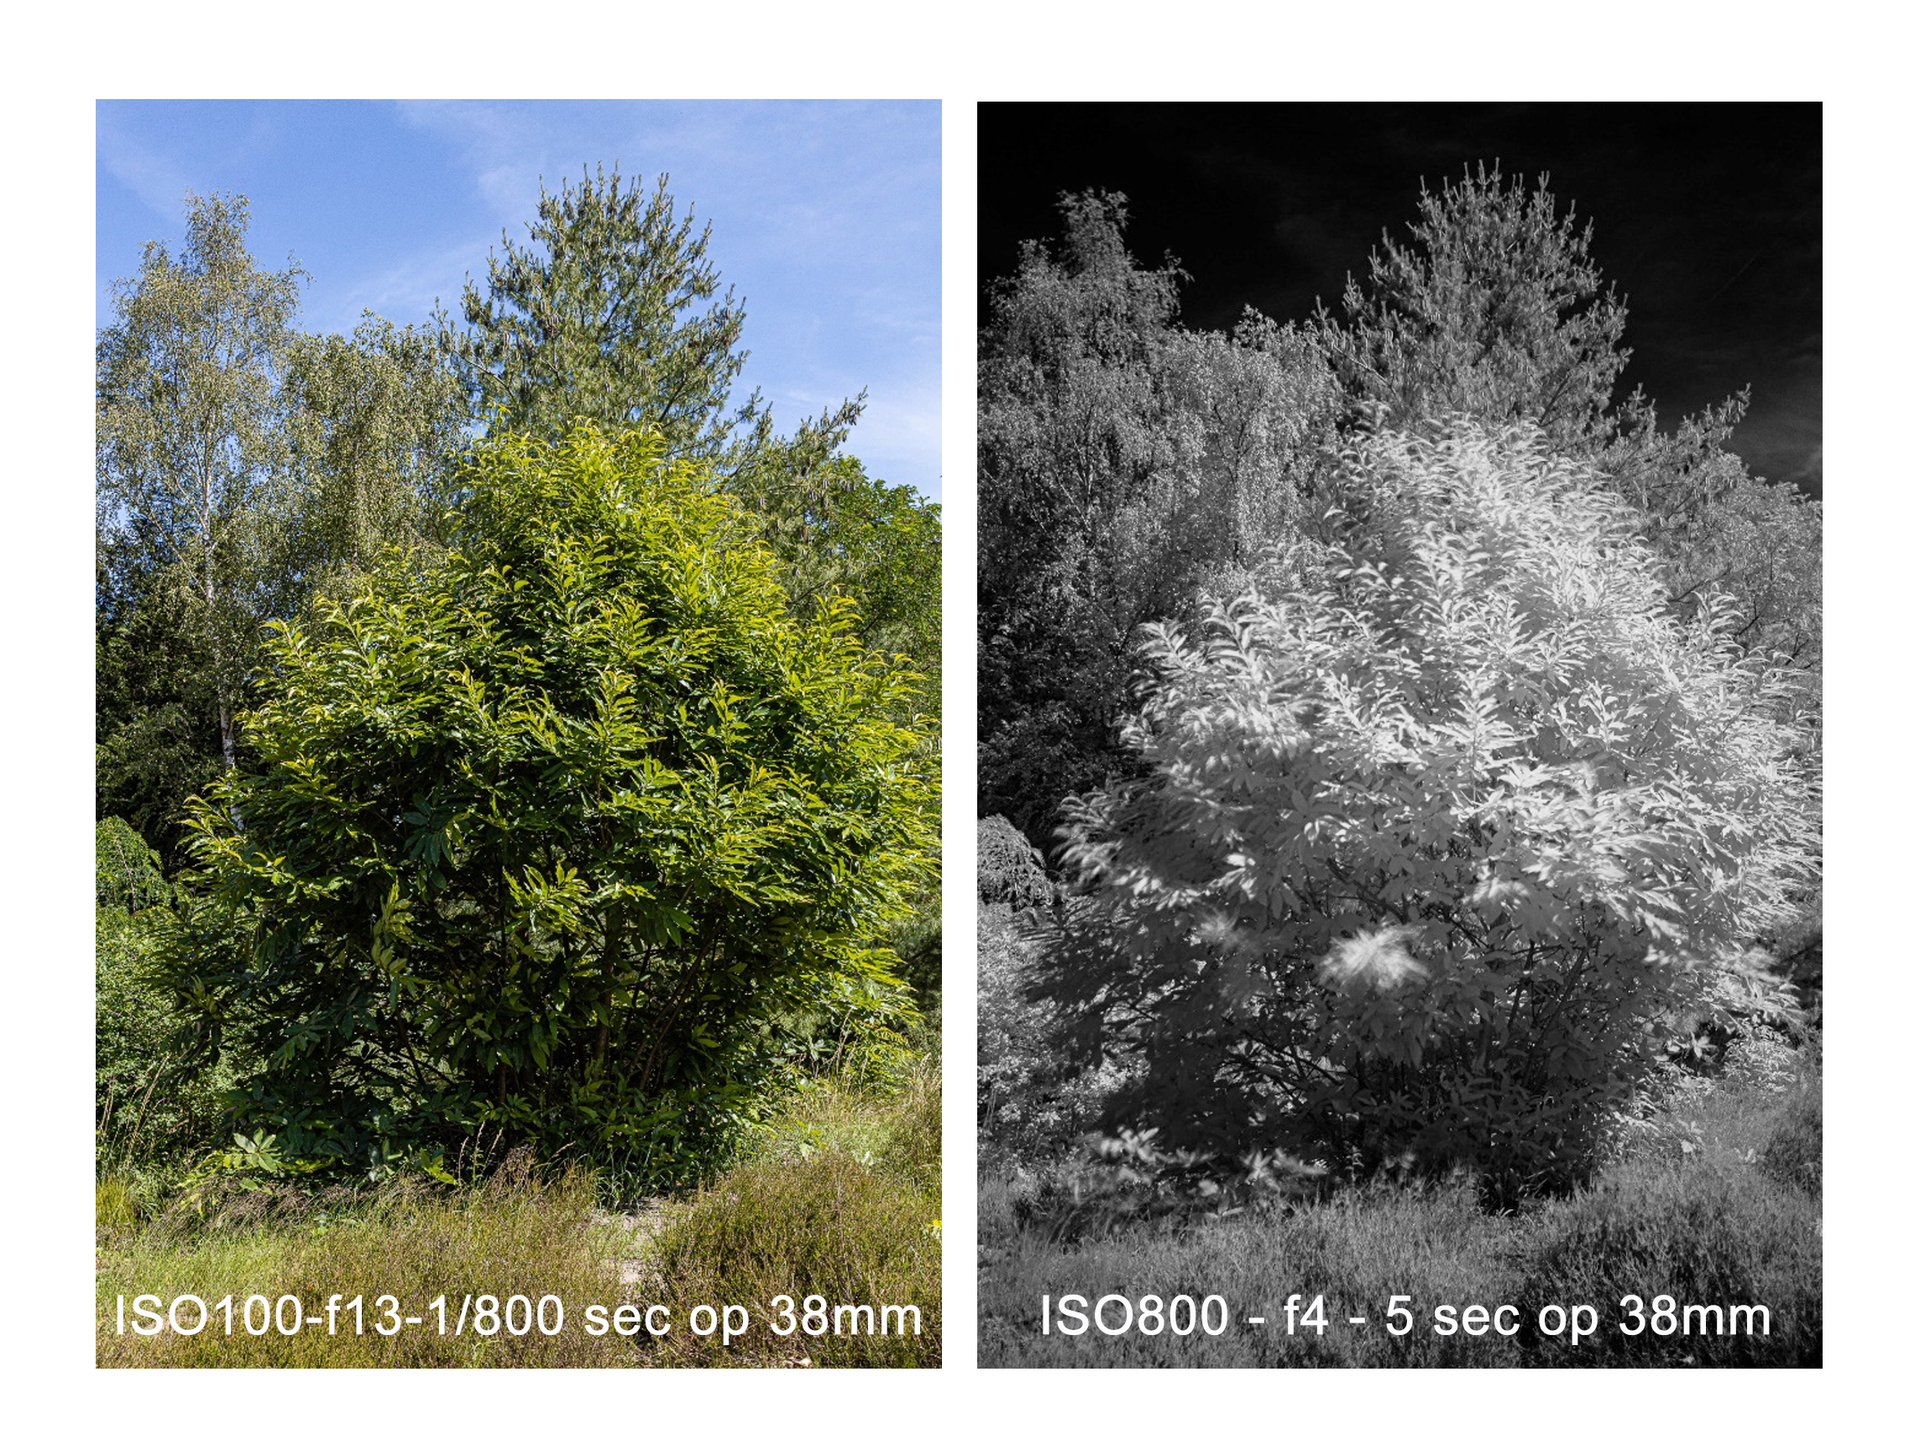
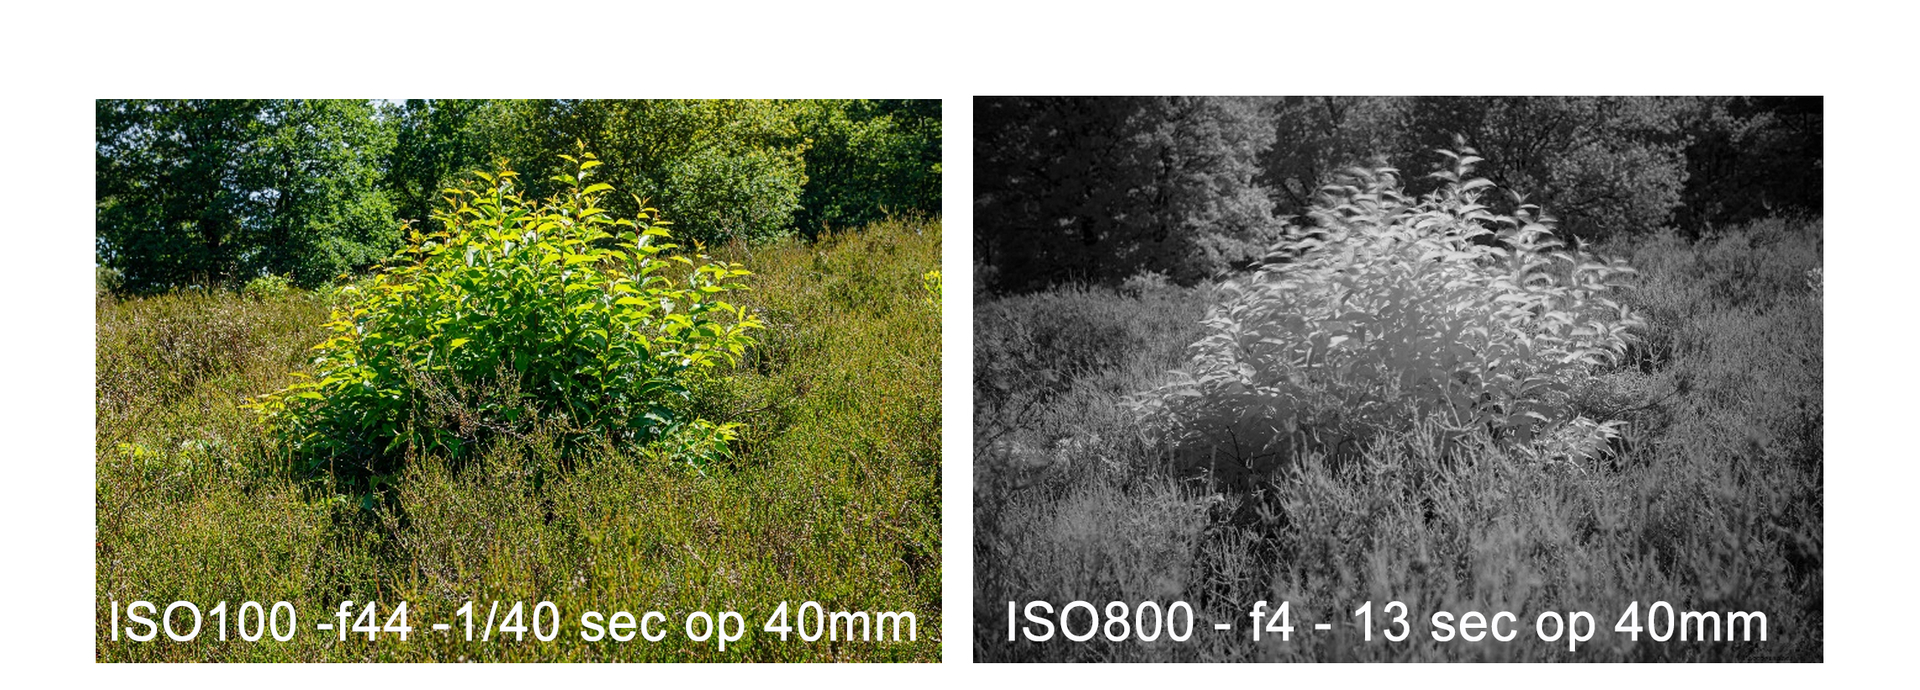
- The 720nm IR filter (IR72) equals 5/6 stops of light reduction. So not to capture movement in trees, grass and animals. You need a clear sunny day for optimal exposure times. It is best to take infrared photos from late in the morning (11am) until about 3PM to 4PM. During this period you have the most light.
- Use a tripod. Because you reduce your available light when you use this filter, you will find that exposure times are more challenging to shoot handheld. To avoid excessive shutter speeds, you can increase the ISO or make the aperture a bit larger.
- Extreme lighting options – Sunrise and sunset are not ideal situations because the available light is low.
- Don't be shocked that your photo is light red if you take your photos in color. This is what you want it to look like with the 720nm filter.
- It is best to choose 'monochrome' image style and photograph in RAW. This way you immediately see the result of the influence of infrared.
- When you are done and satisfied with your photos. You are now ready to move to Post Processing.
The operation in Post Processing:
- Because you photographed in RAW, you can, for example, choose color in Lightroom during the basic editing, your photo will show red, but we will adjust that
- Choose a white balance between 2000 and 2500 Kelvin or the manual white balance that you made from the grass.
- Monochrome conversion is the easiest process, just reduce the saturation to -100. Do not use the black and white button as this will change your color profile and will require extra work to restore the lost white foliage.
- Adjust your black, white and contrast as shooting in infrared can reduce contrast. Remember, you're looking for deep and rich blacks in the shadows and sky and fluffy, glowing whites in the foliage. As if it were snow.
The color processing is a little more difficult and requires some additional steps:
- For this you will need to use Adobe's DNG profile editor.
- This allows you to create a custom profile so you can further cool down the photo. Remember that your white balance is already set to 2,000-2,500 on the temperature scale and cannot be shifted any further to compensate for the red tones.
- Install your new color profile (call it something obvious like infrared) and select your new profile.
- Select the white balance picker and select a white spot in the foliage. This automatically corrects your white balance and displays the colors in Yellowish/Orange and Blue.
- Using the Hue and Saturation Tools you can adjust to make the foliage yellow, red or whatever you want. Don't forget to adjust your contrast, black, white and haze tool.
Some possible pitfalls:
- If you're struggling with the filter, remember irregularities such as hotspots and ghosting. It's not the filter, it's your lens or settings. Try a different lens combination or adjust your settings.
- Often, the older the lens, the better! Most modern lenses have coatings on one or more pieces of glass in their construction that can cause artifacts when photographing. That's not to say the modern lens can't do the job. There is a certain amount of trial and error involved to find the right one that works.
- Zoom lenses are usually the worst offenders. Certain focal lengths can be a problem, usually at the wider focal lengths. To further confuse matters, some Prime Lenses can also suffer from the same artifacts, usually again, the wider Prime Lens.
- Understanding your camera system is crucial and experimentation is highly recommended in finding which lens, setting, filter combination works best.
Conclusion:
- I did all my tests with the 77mm screw filter.
- It is easy to place on the lens.
- Even though I used a 17-40mm f4 zoom lens, I didn't notice any problems such as hotspots or ghosting.
- The more light, especially direct sunlight, gives you better infrared photos.
- If you are a photographer who would like to take an infrared photo, this is an indispensable filter in your bag.
- For example, after you have photographed a sunrise, you can easily do some infrared photography later in the day in an area where there are some trees (shrubs).
- Due to the very good quality of the filter, glass, scratch resistance, easy to clean and water/dust repellent, this is certainly one of the better filters in the filter range.
- That's why, for me, Kase filters are among the better filters.
- Highly recommended
Here are some more photos taken with the Kase filter IR720:
Wijns Patric, Brand Ambassadeur Voor de Benelux.
Comments (0)
No comments found.